
Installing our single rod carrier mounts
What you'll receive
Our single rod carrier mounts consist of two sets of the hardware pictured below. Each set includes a u-bolt clamp to grab the tube, and a pair of laser cut stainless plates to attach the clamp to your rack.
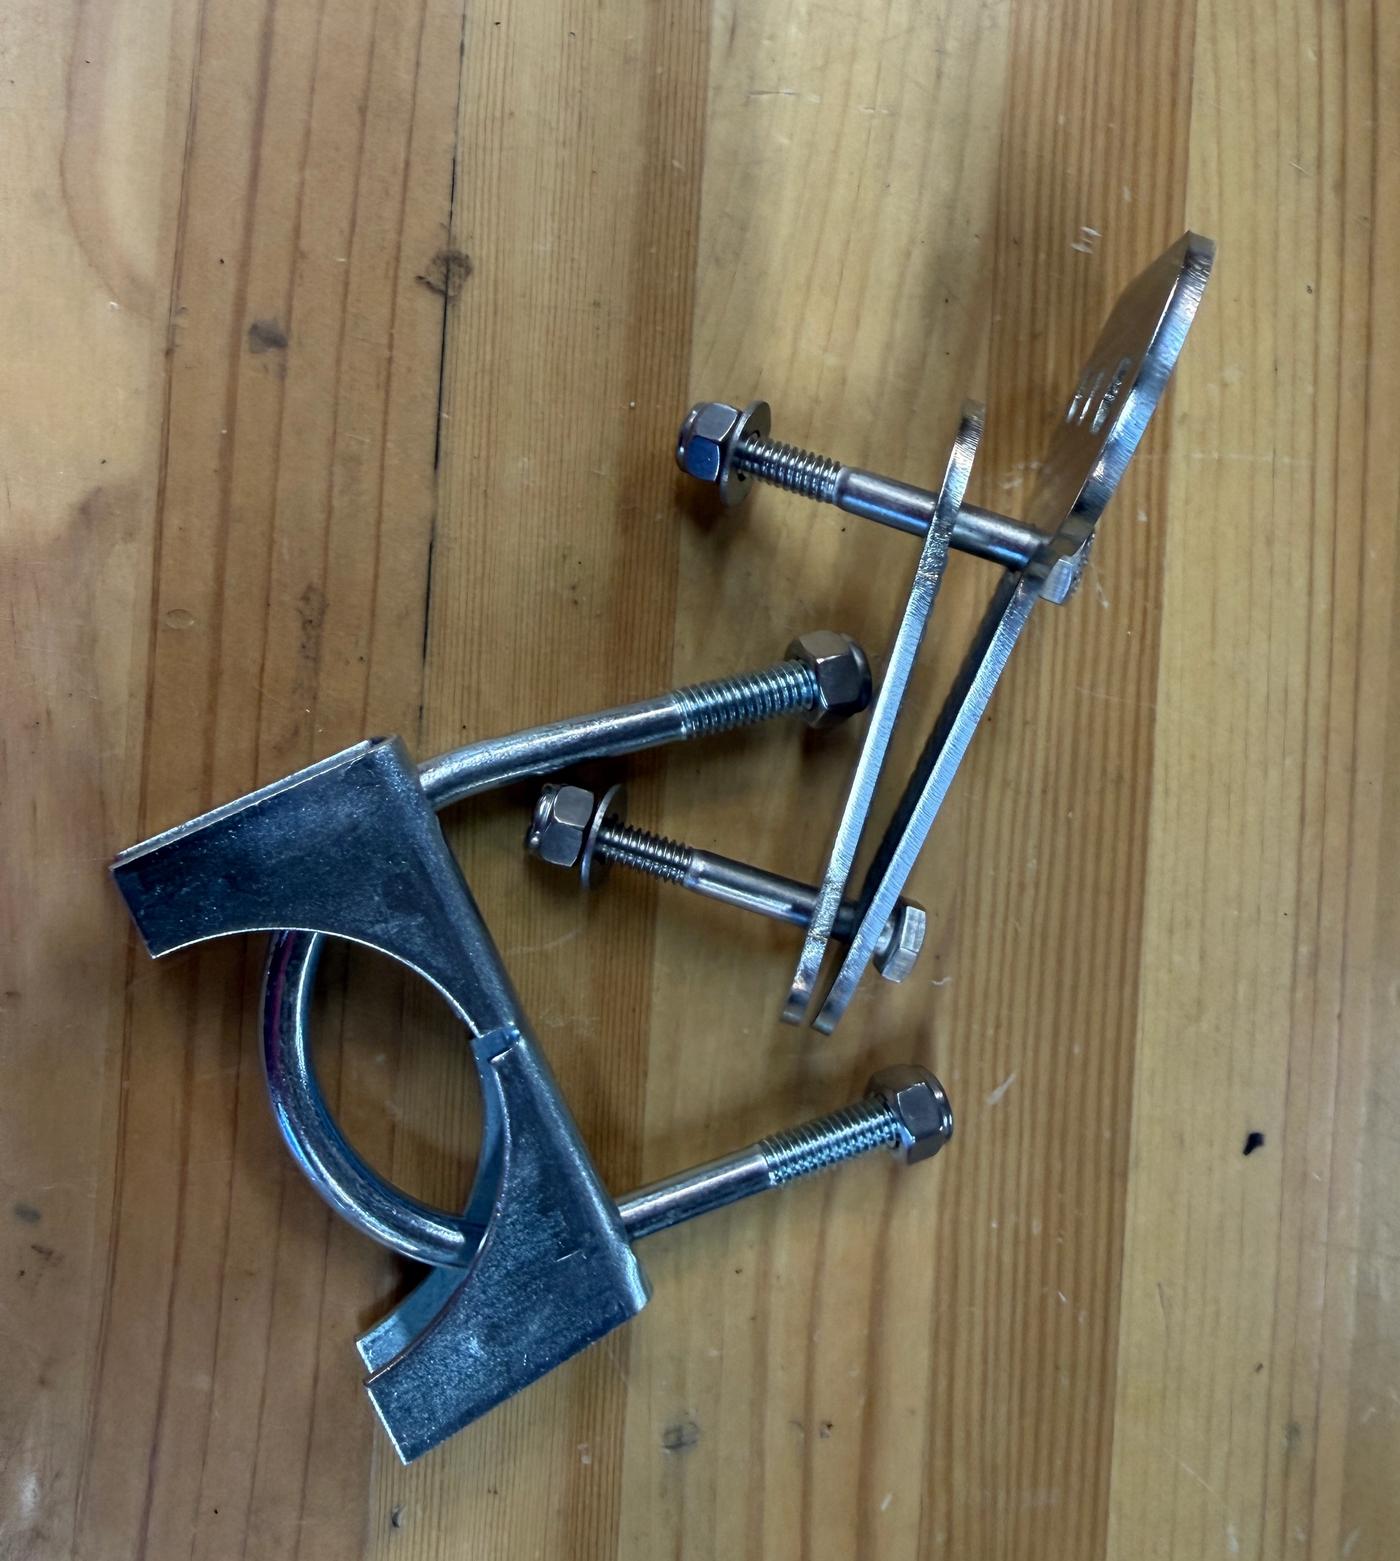
Initial assembly
Start by disassembling the two laser cut plates and setting aside the hardware. Then install the u-bolt as shown, with the rubber padding strip on the side opposite the clamp. You're now ready to start installing everything on the vehicle.
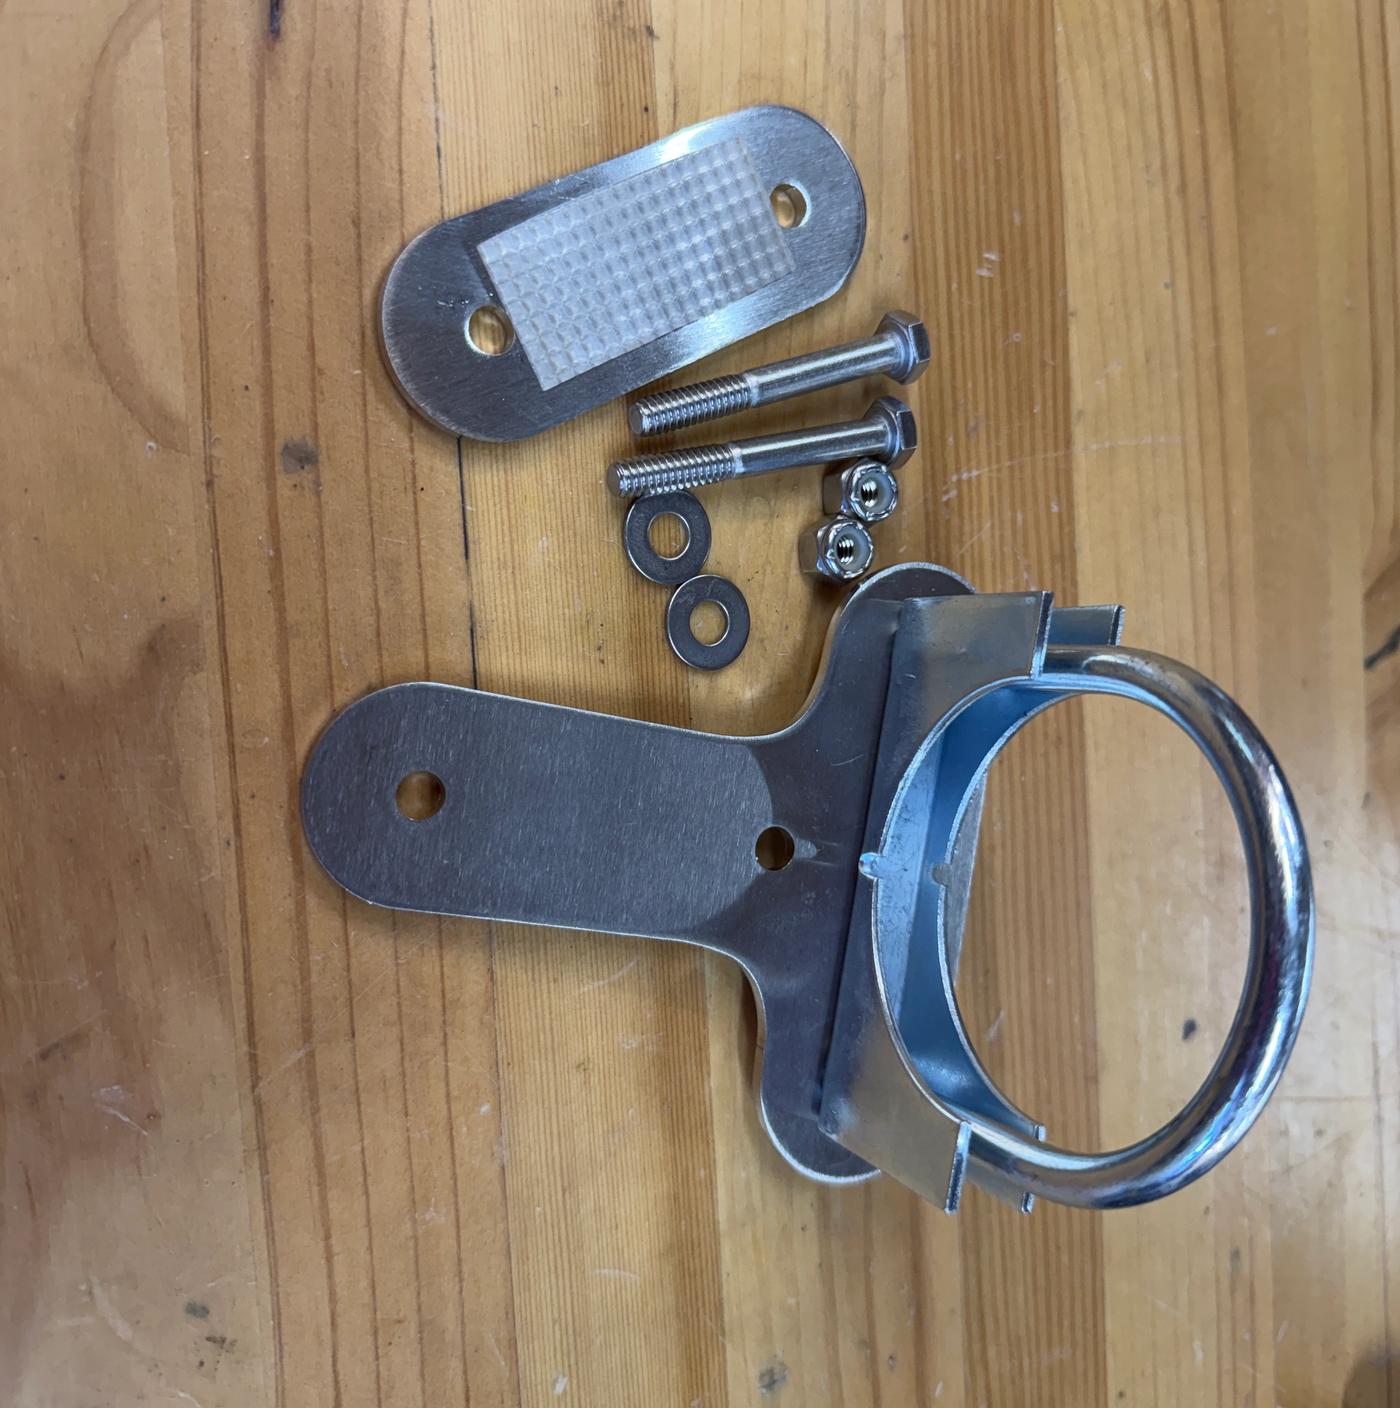
Fit to your rack
Re-assemble the two laser cut plates around your rack. It's generally best to orient them to create the greatest possible distance between the clamps (front with clamp forward, rear with clamp backward).
Keep all the hardware loose at this point.
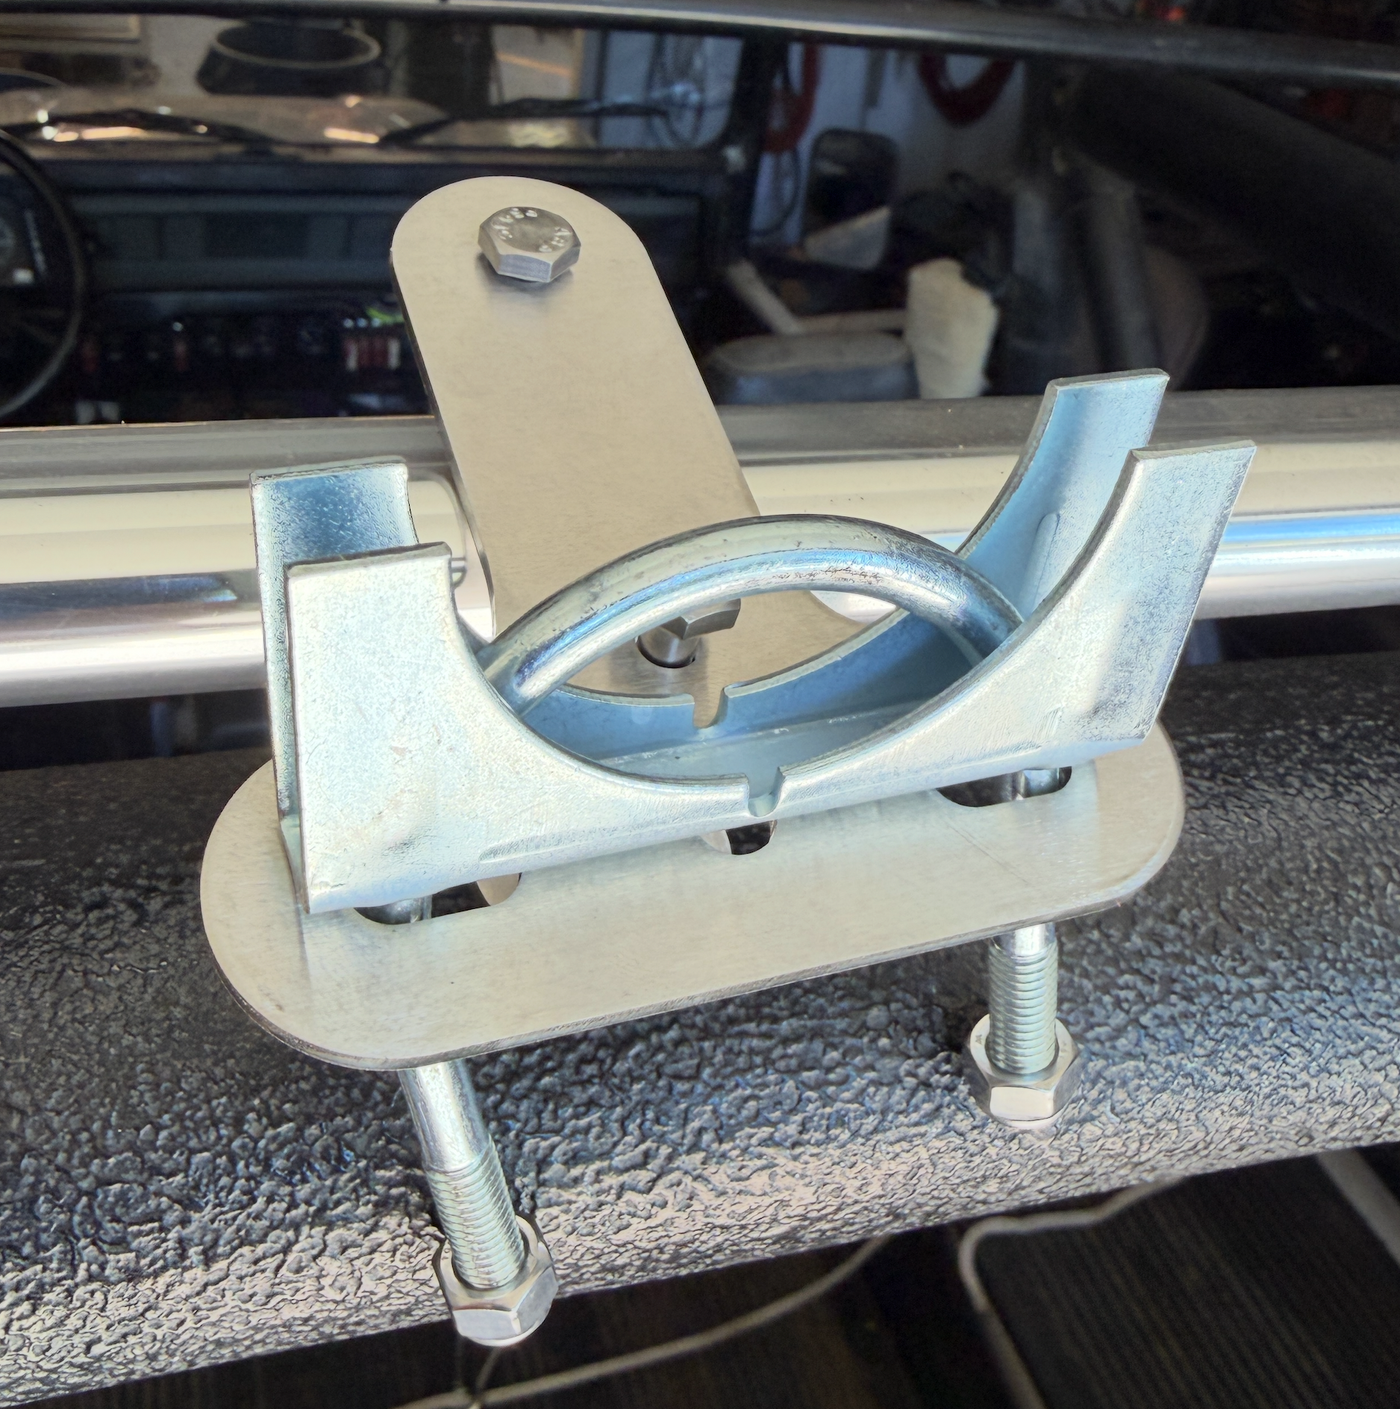
Once you have both of them on the rack bars, you can slide in your tube.
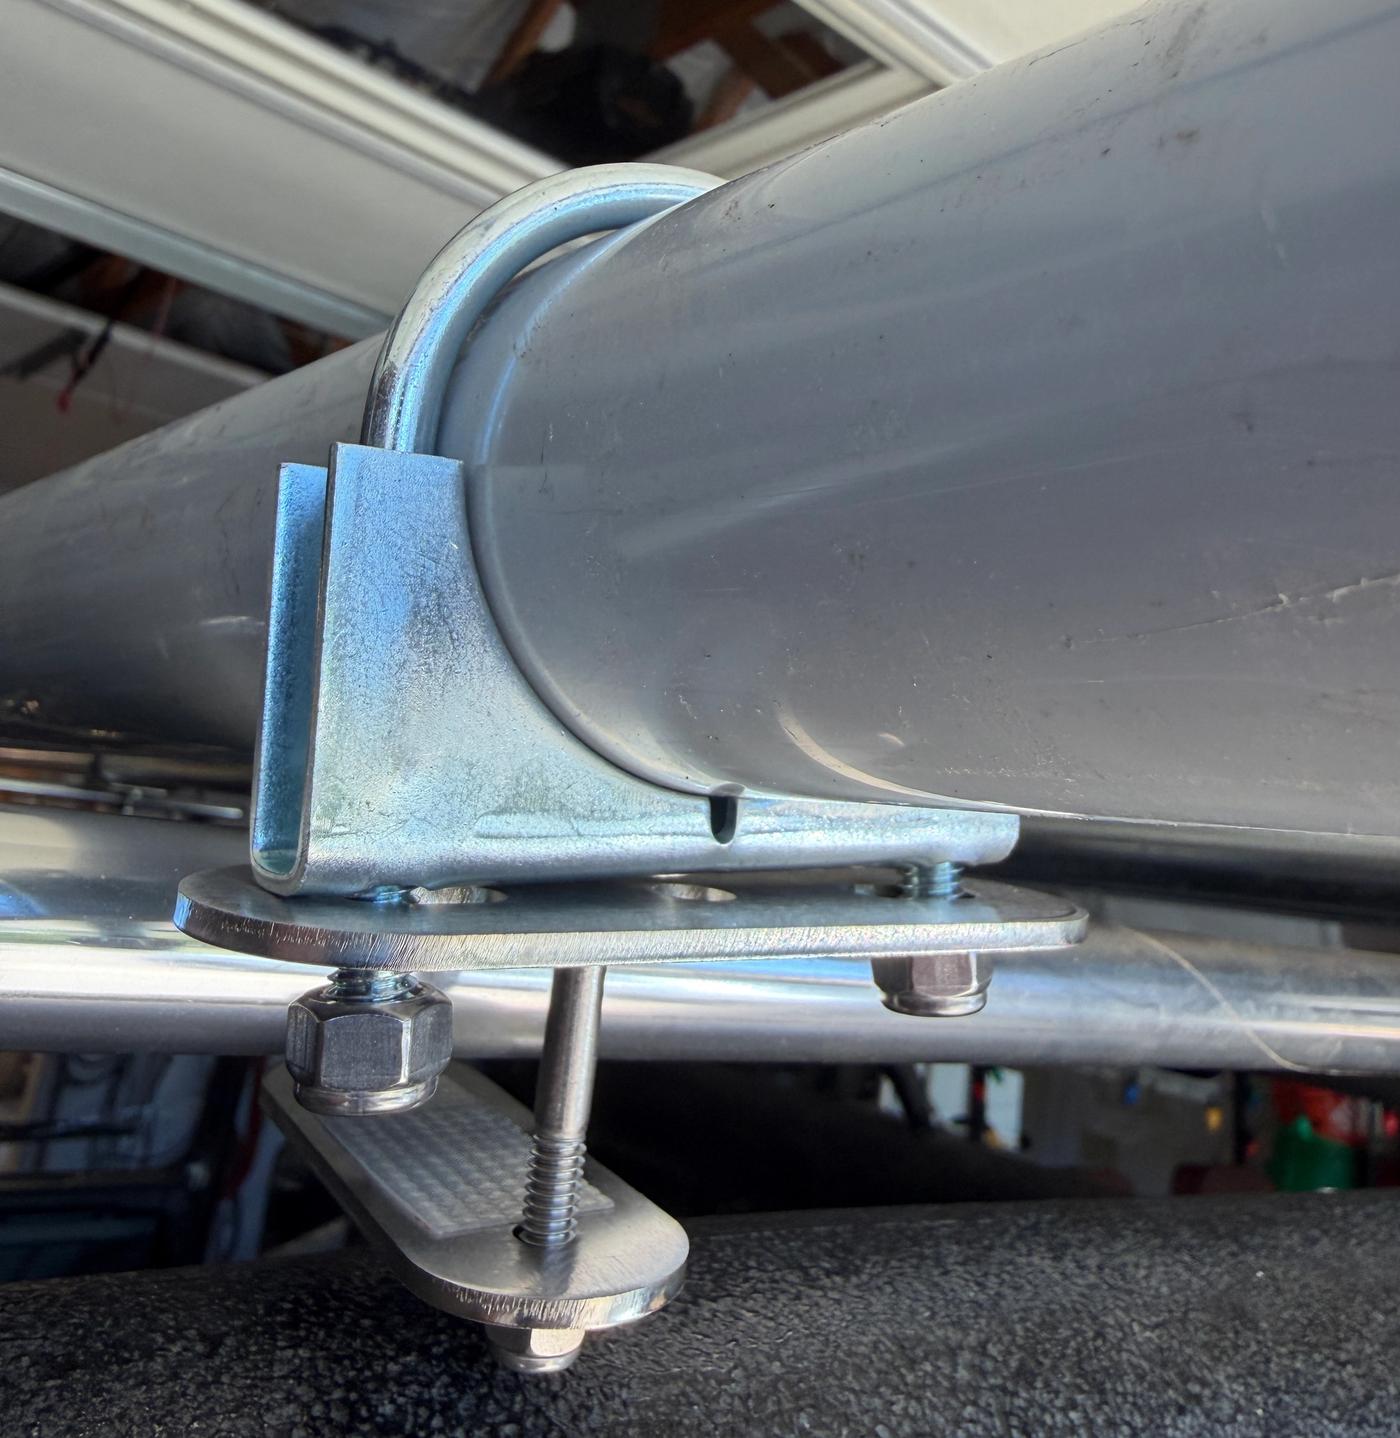
Now partially tighten all the nuts, so that it's not flopping all over the place, but you can still reposition everything. Make sure the clamps are as close as possible to parallel to the centerline of the vehicle.
Pick one end and tighten the bolts to clamp the laser-cut plates to the rack bars. Keep the top plate as close to level as you can. Clamp it tightly. It's okay if the plates flex a bit. Then tighten the nuts to secure the u-bolt around the tube.
Now go to the other end and repeat the process, double checking that everything is as square as you can.
That's it!